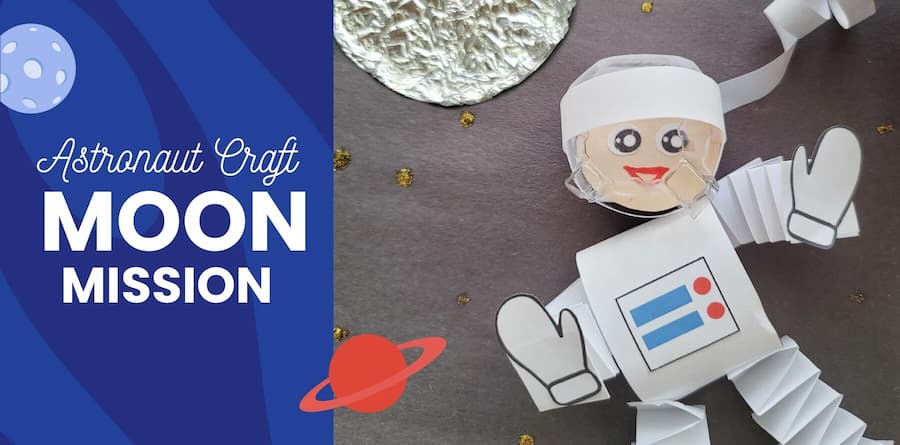
Astronaut Craft – Moon Mission
Do you dream of exploring outer space? Wonder what it’s like to walk on the Moon? Fuel up your imagination for a space journey with this DIY astronaut craft from Little Passports!
The Moon is a magical sight to behold in the evening sky that can also be visible during the day. It is Earth’s only permanent natural satellite. The Moon helps stabilize our planet’s wobble, which moderates our climate and makes Earth more habitable. It’s also the only place beyond Earth where humans have set foot.
Astronauts are trained by a spaceflight program to pilot, lead, or be part of the crew of a space expedition on a spacecraft. They spend a lot of time learning their craft in water (swimming while wearing shoes and a 250-pound flight suit) and underwater in their space suits to simulate spacewalks and prepare them for the weightlessness of space.
To celebrate the anniversary of when humans first landed on the Moon on July 20, 1969, we invite you to suit up and fly to the Moon with this out-of-this-world astronaut craft!
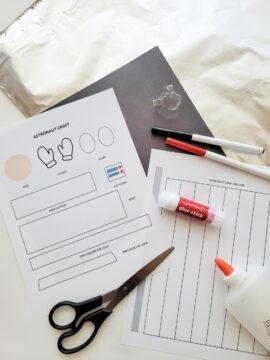
Supplies
- Two sheets of regular copy paper for the printable template
- Pencil, ruler, and markers (if drawing own astronaut)
- Scissors
- Glue
- Red marker
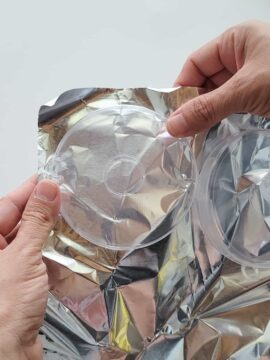
- Clear egg carton for the visor (optional)
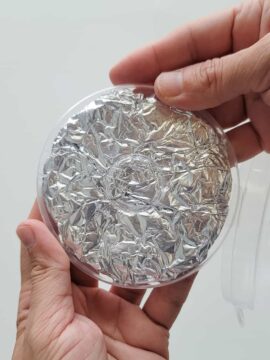
- Foil
- Circular mold for the Moon (optional)
- Black sheet of construction paper
- Glitter glue (optional)
Instructions
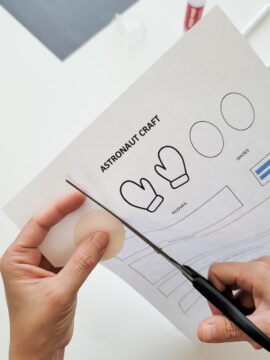
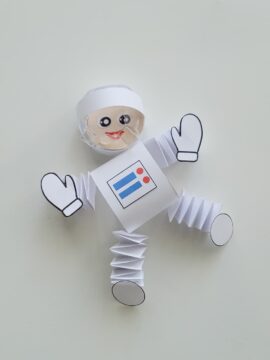
Step one: Print the downloadable template and cut out all the pieces. Group the pieces together by body part to keep track of all the cutouts.


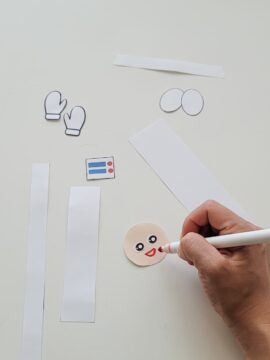
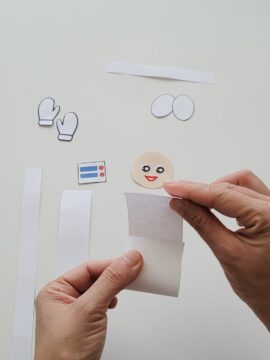
Step two: Glue the eyes on the head and draw a mouth.
Step three: Assemble the body. Roll the paper so it forms an oval shape, then glue the end pieces to keep it secure. Do the same for the head support and the ring around the head.
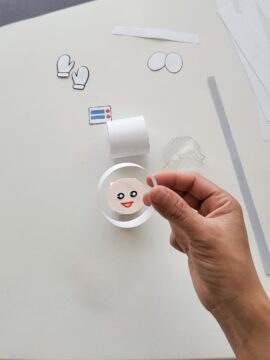
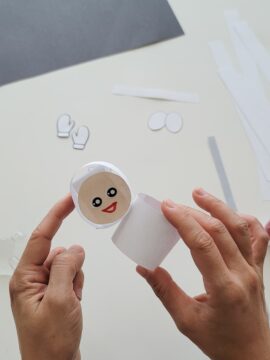
Step four: Glue the head onto the paper ring labeled “Head Support.” Apply glue to the inside rim of the ring around the head and insert the head inside. Apply glue to the clear egg carton and insert it inside the ring. Apply glue to each end of the ring around the visor, then wrap it around the top half of the visor and stick.
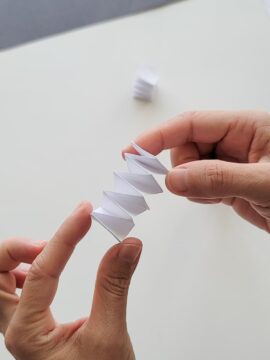
Step five: Time to make the arms and legs. After cutting the eight strips of paper, glue two strips together, forming an L shape. Fold one strip over the other alternately into pleats, resembling the bellows of an accordion. Glue the last fold and cut off any excess.

Step six: Glue the suit patch on the astronaut’s body, the mittens on the arms, and the shoes on the legs.
Step seven: Manually shape the Moon by crumpling foil into the shape of a circle, or by using the circular mold if available.
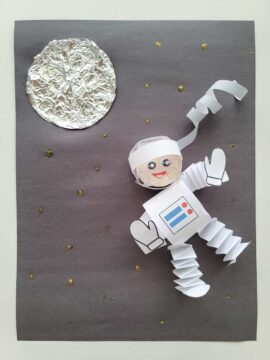
Step eight: Glue the Moon and astronaut on a black sheet of paper. Curl the tether rope cutout by wrapping it around a marker, then glue it on the paper next to the astronaut’s head. If desired, add stars by dabbing glitter glue on the paper.
Get More Crafts from Little Passports
We hope you enjoyed the Moon Mission astronaut craft from Little Passports! Don’t forget to subscribe to our email list below for more craft ideas every month, plus exclusive discounts on our award-winning activity kits for kids.