How to Make Magnetic Putty with Kids!
My son received a container of magnetic putty for his birthday last year and it was pretty awesome! We’ve made putty for years using glue, water, and Borax and decided to try our hand at magnetizing it! We used the same recipe and adding a few tablespoons of iron oxide powder. It worked like a charm! If you prefer to not use Borax, you can find a basic putty recipe that uses liquid starch instead and use that in its place. As with any project like this, adult supervision is required.
Ingredients:
- 1 (4 oz) container white glue
- 1 cup warm water, divided
- 4 T. iron oxide powder
- 3/4 tsp. Borax
- rubber gloves
- 2 glass bowls or cups
Links to supplies on Amazon.com:
Let’s Get Started!
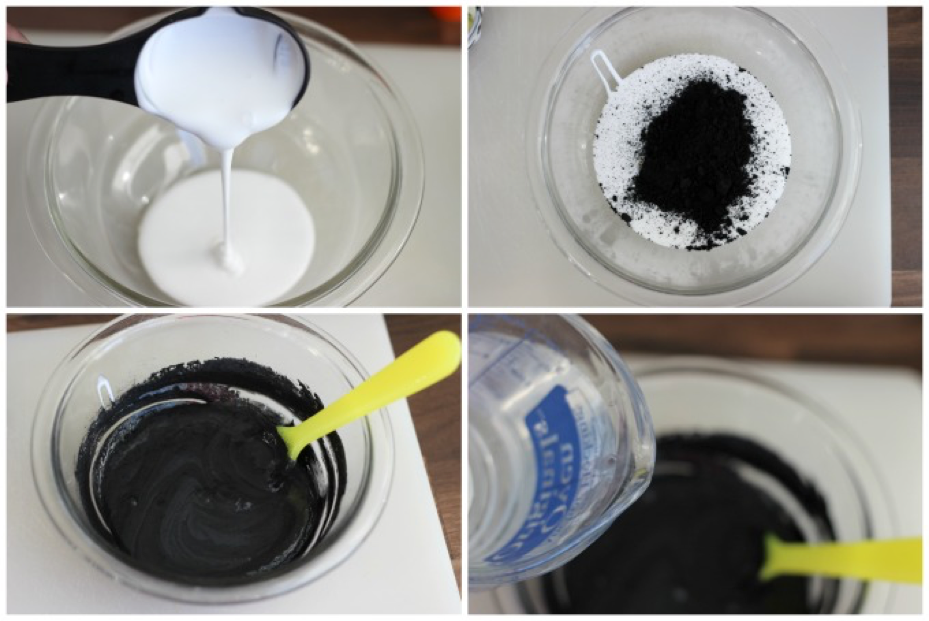
In first bowl mix glue, iron oxide powder and 1/2 c. warm water. Stir until smooth.
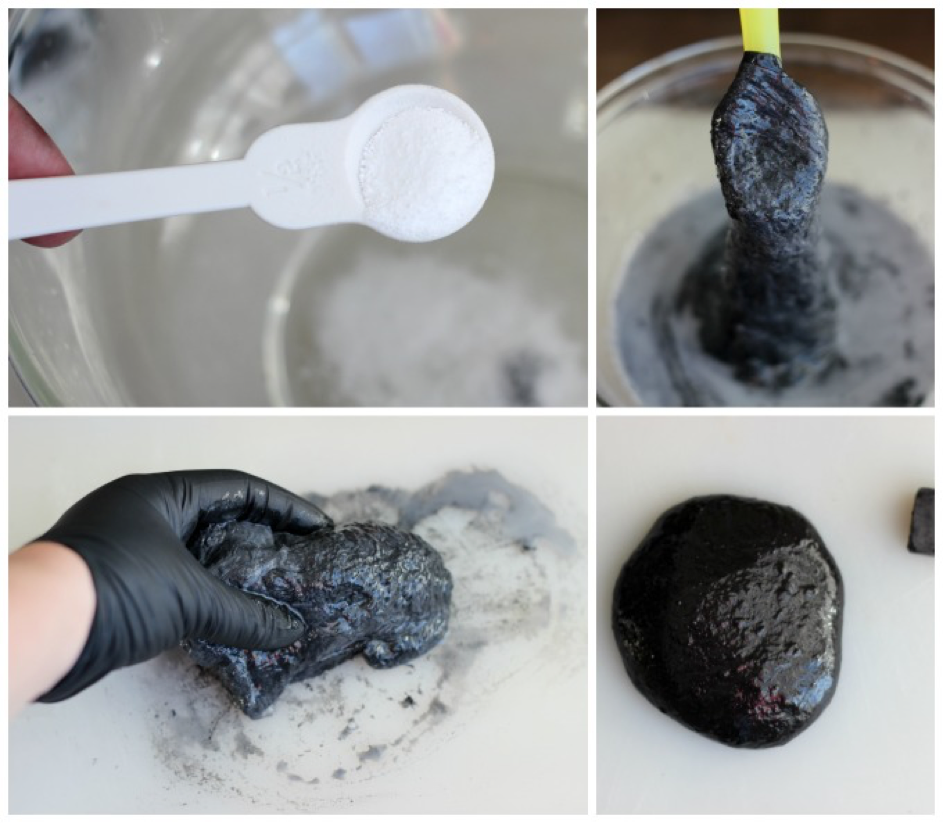
In second bowl combine Borax and remaining 1/2 cup warm water. Add to the mixture in the first bowl and watch how it reacts when you stir!
Not all of the liquid will be absorbed into the putty. Simply lift out the putty mass and work it around with your hands. Rubber gloves will prevent staining on your fingers from the iron oxide.
Once your putty is formed and comes together into a smooth mass the iron oxide will no longer stain your hands.
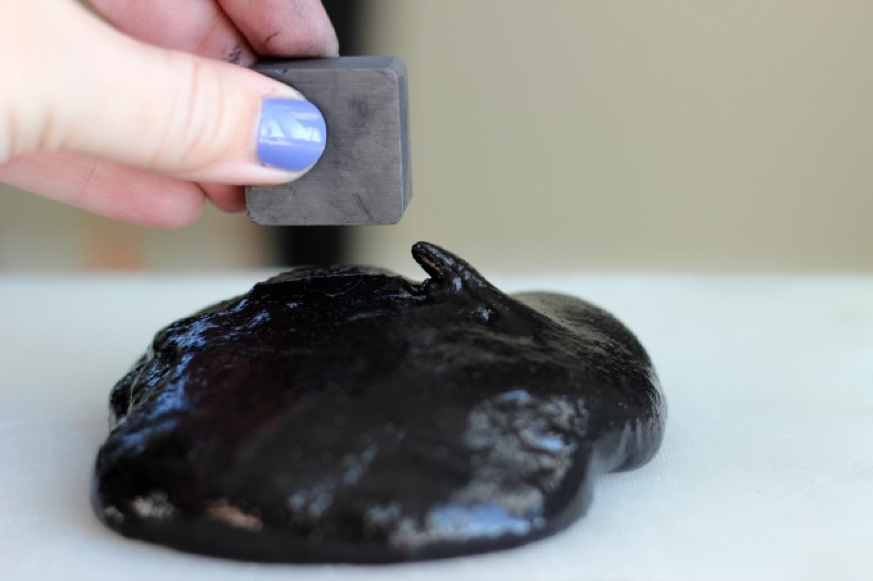
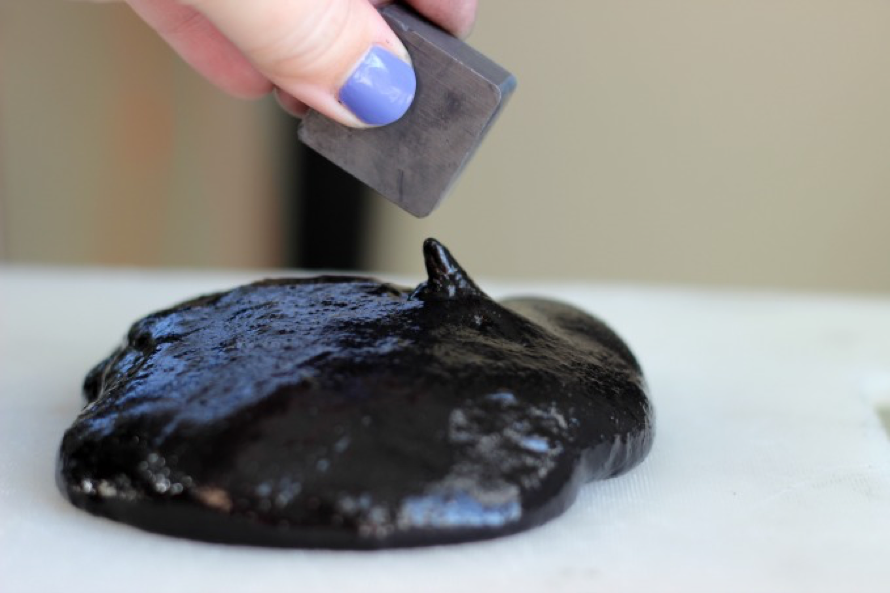
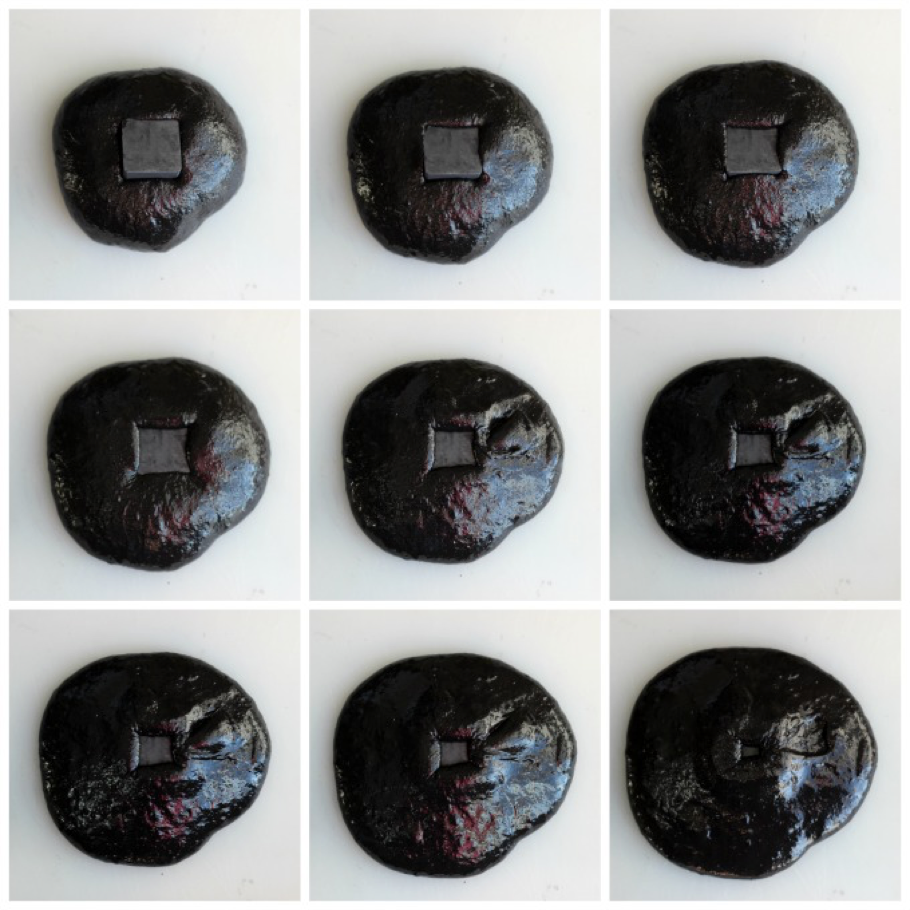
Now for some magnetic action!
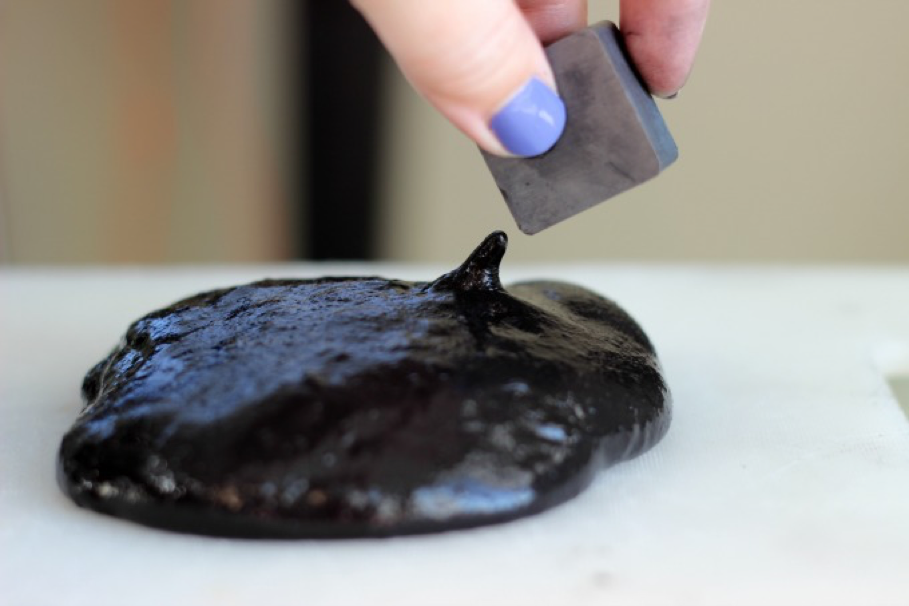
Basic craft or kitchen magnets WILL NOT react much with the putty. You will need a strong magnet. We used the one that came with my son’s magnetic putty kit, but the best magnets for this putty are the neodymium variety.
Pinch off a small “worm” shaped piece, place the magnet next to it, and watch it move!
The putty will also sink in magnets. Place the magnet on top and watch it sink!
Store your putty in an air-tight container or baggie for future use.