Edible Science Experiment for Kids!
Kids are natural scientists. Beginning at babyhood, they are always putting hypotheses to the test. When they throw their spoon on the floor, they think Mommy will probably pick it up. Or, When they get too close to the stairs, Daddy might pick me up. As they grow older, it’s no different. They are always testing and learning.
Channel that scientific curiosity by making your own geodes in a fun kitchen experiment!
What is a geode?
A geode is a round or oval-shaped rock that’s plain on the outside but lined with beautiful crystals on the inside. Ask your kids to imagine how such a rock could form. After a few guesses, explain that geodes form in rocks that are hollow. When air gets trapped inside a volcanic rock, for example, a bubble can form. As water moves through the bubble, crystals form, and over millions of years, these crystals build upon each other.
Your kids will have a blast making their own geodes! It will take about a week from start to finish, and each step of the experiment below takes less than ten minutes. Perfect for your little scientist’s attention span!
In case you thought it couldn’t get any more exciting than that, let me tell you this: the geode you and your kids create will be edible! Oh yes, there’s chocolate involved.
Ingredients:
- Bowl
- Aluminum foil
- 3 cups sugar
- 1 cup water
- 1 cup flour
- Food coloring (optional)
- White chocolate chips
- Milk or dark chocolate chips
- Sandwich cookies (like Oreo)
Instructions:
Step one: Pour the sugar and water into a pot. Bring the solution to a boil for several minutes, stirring continuously, until the sugar is dissolved. When the liquid is completely clear, you’re ready to go. At this point, you can add food coloring if you want a colored geode.

Step two: Pour the flour into a medium-sized bowl. Take a large sheet of aluminum foil and fold it over the edges of the bowl. Pour your sugar solution into the bowl, cover it with another sheet of foil, and let it sit on the counter for a couple of days.

Step three: After two or three days, uncover the bowl and lift the foil out of the bowl. Pour the excess solution into another bowl and carefully peel the aluminum foil off the rock candy crystals that have formed. Set this hardened candy bowl upside down on a paper towel and let it dry for another day.

Step four: Melt the white chocolate chips using either the stove or the microwave, being careful to stir every fifteen seconds. Set your geode upside down on top of a glass and pour the melted white chocolate over the top, using a spoon to spread it down over the edges. Let the white chocolate harden a bit.

Step five: Next, melt the milk or dark chocolate chips. Pour this chocolate over the white chocolate, using a spoon to spread it down over the edges. Put a couple of chocolate sandwich cookies into a bag and crush them. Sprinkle the crumbs over the chocolate before it sets to create a rough, rocky look. Let it set and that’s it!

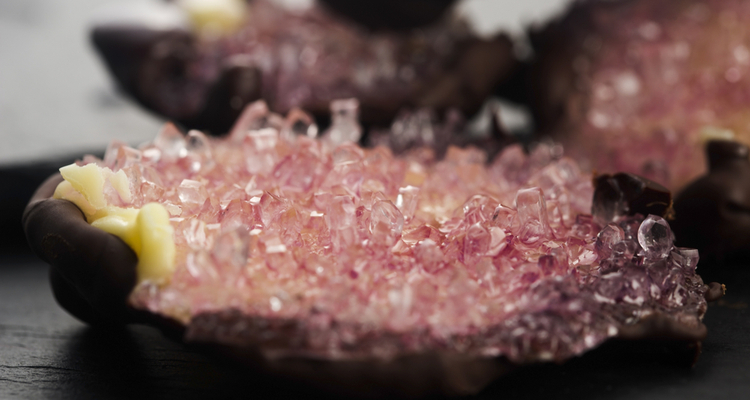
Now, you may enjoy your beautiful (and tasty) geode!

We hope you enjoyed your edible experiment! We’d love to know what other kid-friendly science experiments you have done with your kids. Share with us on Facebook or Instagram!