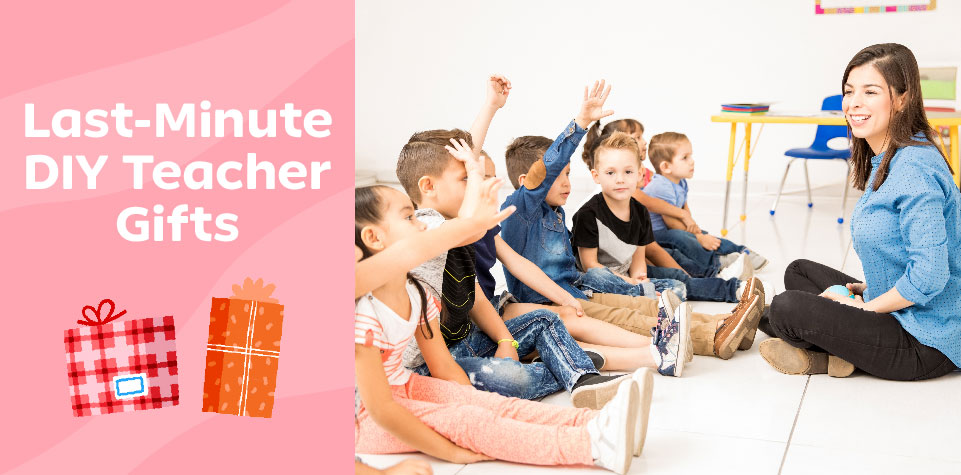
3 Adorable DIY Gifts for Your Kids’ Favorite Teachers
Ignite a feeling of gratitude in your kids for their teachers!
Teachers play an important role in many kids’ lives. They educate, inspire, and encourage their students, giving them the tools they need to be their best. A great teacher has the power to mold a child’s life for the better. They deserve our applause—and sweet gifts crafted by their students.
Teacher Appreciation Day in the U.S. falls on the Tuesday of the first full week in May each year. It’s the perfect time for your children to acknowledge, admire, and appreciate the awesome teachers in their lives.
Thoughtful Gifts to Make Teachers Smile
Some of the best teacher appreciation gifts are DIY crafts made by their students. A decorated mason jar full of candy (complete with a printable gift tag from Little Passports), a bouquet of paper flowers, or even a hand-folded origami heart can make teachers feel loved and recognized for their work.
This Teacher Appreciation Week, encourage your kids to come up with a thoughtful gift idea perfect for their favorite teachers. And if they need a little inspiration, you’re in luck—we have some great gift ideas to share!
Check out our list of last-minute DIY teacher gifts that children can make using items you already have at home.
3 DIY Teacher Gift Ideas
Here are our three favorite unique teacher gift ideas. Children of all ages can make these crafts with supervision, but an adult may need to help younger children when necessary.
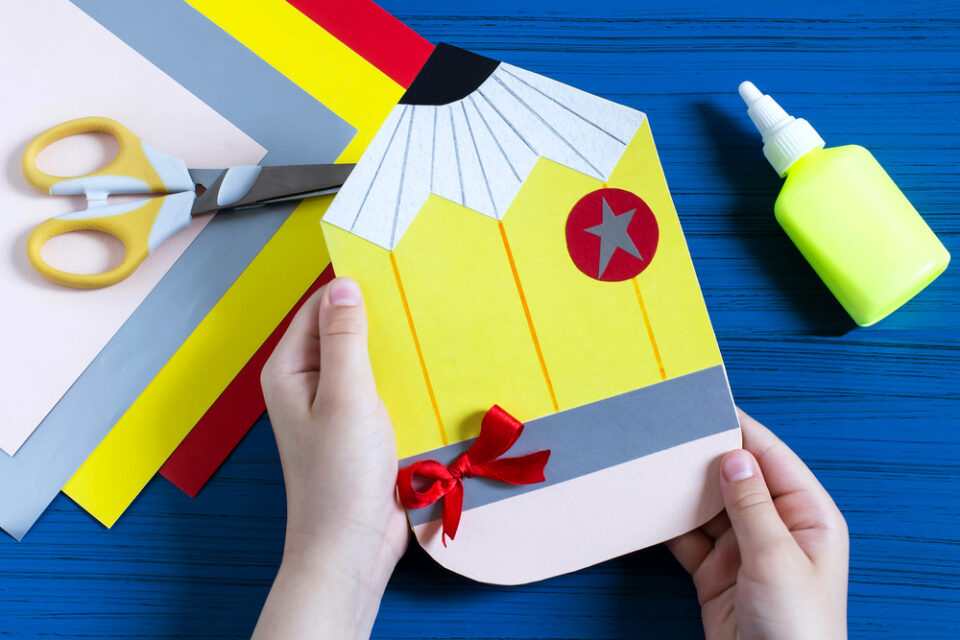
Pencil Greeting Card
Writing a heartfelt message in a greeting card is an excellent way for kids to show their teachers how much they care and demonstrate the writing and spelling skills they learned in class. Your kids can make this cute card for teacher appreciation week or as an end-of-year teacher gift.
Materials
- Colored cardstock (black, white, yellow, red, and pink)
- Child-safe scissors
- A ruler
- Nontoxic glue
- Colored pencils or markers
- A small craft ribbon
Directions
- Fold a sheet of yellow cardstock in half. Use scissors to round out the bottom corners. Keep the paper folded until the card is finished.
- Use the ruler to draw two diagonal lines that slope downward from the top-center of the folded paper to its sides. Cut along those lines to make a pointed pencil tip.
- Draw a zigzag pattern across the corner of your white cardstock. Each zigzag should be about 2 inches (5 centimeters) long. Use a ruler to keep the lines straight and even.
- Cut the white cardstock along the zigzag, and glue it over the triangular tip of the yellow paper.
- Cut a 1 ½-inch (about 4-centimeter) triangle from the corner of the black cardstock and round the edges. Glue this piece over the white paper to make a pencil tip.
- Cut a piece of pink cardstock about 4 inches (10 centimeters) wide and 5.5 inches (14 centimeters) long. Round the bottom edges, then glue the pink piece to the card’s bottom. This will be the pencil’s eraser.
- Cut a strip of gray cardstock about 1 inch (2.5 centimeters) wide and 5.5 inches (14 centimeters) long.
- Glue this piece about 2 inches (5 centimeters) from the card’s bottom over the top of the pink piece to represent the metal collar on a pencil.
- Allow the glue to dry, then decorate the card with colored pencils or markers. Draw orange lines from the tip of each white zigzag to the gray strip of paper as well as gray, blue, or black lines on the white part of the pencil (see picture above).
- Draw and cut out a 2-inch (5-centimeter) circle from the red cardstock and a star with the remaining gray cardstock. Glue these pieces together, then stick them on the right-hand side of the card (under the white zigzag).
- Glue a craft ribbon to the gray strip at the bottom of the card. Then, write a sweet message inside the card that will make any teacher smile!
Apple Print Tote Bags
When it’s time to head back to school, teachers everywhere prepare for 10 months of carrying a bag full of books, papers, school supplies, and more to and from school every day. Your kids can help them transport everything in style with this easy DIY gift.
Materials
- Protective covering for work surface
- Plain canvas tote bag
- Sheet of cardboard
- Painter’s tape
- Fabric paint (red, yellow, and green)
- An apple
- 3 paper plates
- Paintbrush
Directions
- Place a protective covering over the work surface. Lay the tote bag flat on top of it. Place the cardboard sheet inside the bag (this will keep the paint from bleeding through the fabric).
- Place 2 pieces of painter’s tape horizontally across the tote, with just enough space between them to fit the apple “stamp.”
- An adult pours fabric paint onto the paper plates (one plate per color).
- An adult cuts the apple in half. The child dips one apple half into the red paint and stamps it on the tote between the two pieces of painter’s tape.
- The child repeats the previous step with the other apple half, using yellow paint this time and stamping next to the red apple. They continue to dip and stamp the apples in any pattern they choose.
- Remove the top piece of painter’s tape, and have kids use a paintbrush and green paint to make stems on each apple.
- Let the paint dry completely, remove the second piece of tape, and give your teacher their one-of-a-kind tote!
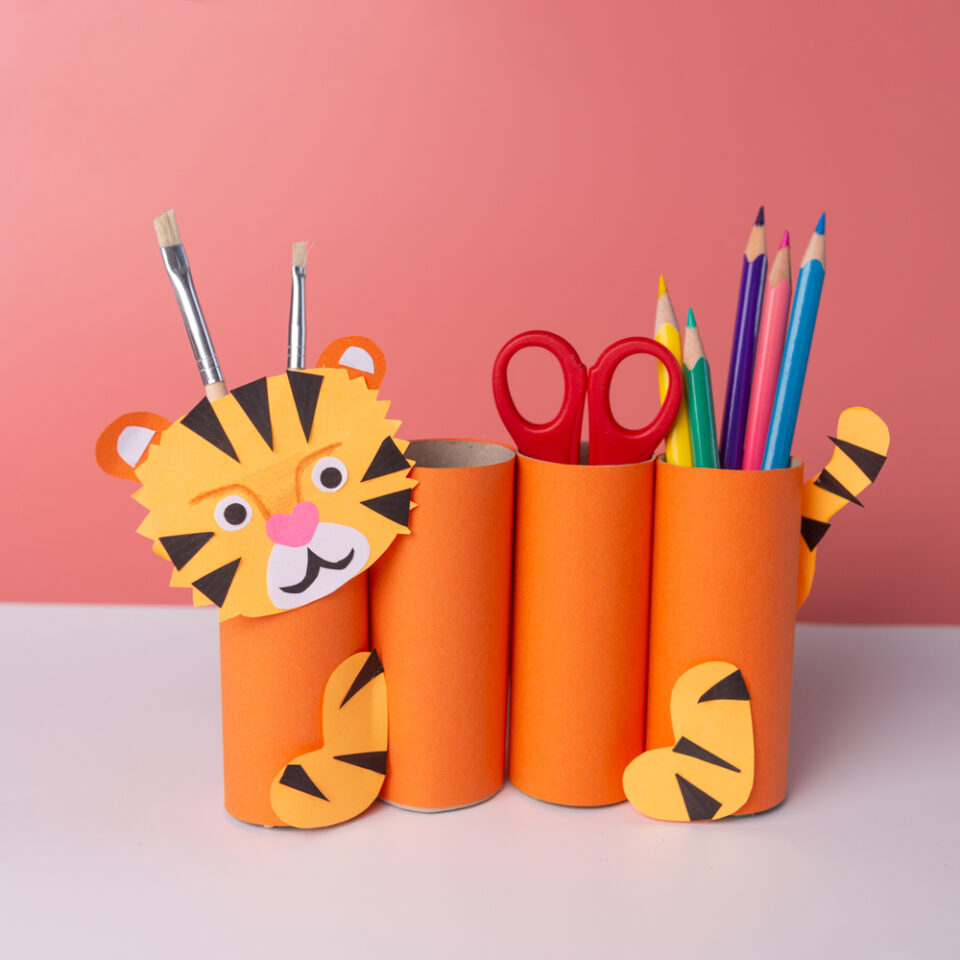
DIY Animal Pencil Holder
Many teachers love to give their desks some personality with photos, knickknacks, coasters for their coffee, and other fun decorations. Your kids can add to the collection with this cute—yet practical—homemade gift for their teachers.
Materials
- 4 empty toilet paper rolls
- Colored paper (colors depend on the animal)
- Wood clothespins (optional)
- Child-safe scissors
- Nontoxic glue stick
- Colored pencil or markers (optional)
- Ruler
Directions
- Using the colored paper, draw and cut out a head, facial features, legs, and tail for the animal of your choice. To make the tiger shown above, cut out a head shape, facial features, two legs, and a tail.
- Place glue on each toilet paper roll and cover it with colored paper (1 sheet per roll). Cut off any excess paper and allow the glue to dry. You can use clothespins or paper clips to hold the paper in place while drying.
- In the meantime, glue the facial features onto the animal head. For the tiger, glue the ears behind the tiger’s head and the stripes, eyes, and mouth on the front.
Note: Kids can also draw the animal’s face onto the head shape with colored pencils or markers.
- Glue the paper rolls together so they make one long line. Glue the animal’s head to the first roll, one leg to the second roll, and the other leg and tail to the fourth roll.
- Cut 4 circles from the remaining paper, and stick them to the bottom of each paper roll. Make sure the circles are of the same size as the toilet paper roll.
- Let the glue dry, and you’ll have an adorable new accessory perfect for a teacher’s desk.
Wonderful Crafts and Endless Hands-on Fun
DIY teacher appreciation gifts can excite your kids about showing others that they care with a thoughtful homemade gift. If your children are looking for more crafts when they finish, Little Passports can help them keep making fun projects all year!
Our Craft Discovery subscription box, designed for kids ages 5–8, includes craft kits and activities that match the seasons. Each box introduces children to a new topic like science, art, geography, or culture––giving your little artists a starting point for exploring the world’s wonders. Order your kids’ first box today!