Take to the Skies with This Simple Paper Airplane Craft
The paper airplane has been a childhood staple for a very long time—in fact, this folded marvel has delighted people for so long that historians aren’t entirely sure about its origins.
Some say the Chinese invented the first paper airplane over 2,000 years ago when experimenting with paper kites. Others believe the planes could have been researched tools of Italian inventor Leonardo Da Vinci and British aviator Sir George Cayley.
Although we don’t know exactly when the first “plane” was folded, many agree that kids played with aerodynamic paper shapes as early as 1864, when they were called “paper darts” (because airplanes had yet to be invented). Since then, children and adults around the world have tried to perfect the art of folding paper and making it fly.
Making paper airplanes is a fun challenge, and with a few tips and tricks, your kids’ planes will really soar. Grab some paper, gather the family, and learn how to make an easy paper airplane.
The Four Forces of Flight
How does a paper airplane fly, anyway? These whimsical creations glide through the air thanks to the four forces of flight: thrust, lift, weight, and drag.
Thrust is the force that moves the plane forward. A real airplane’s thrust typically comes from a propeller or jet engine. A paper airplane’s thrust comes from your arm as you throw it.
Lift is the force that holds an airplane up. On a standard plane, the wings provide lift thanks to their shape, which allows air to move faster over the top of the wing than the bottom. This makes the air pressure above the wing lower than the air pressure below it, resulting in an upward force against the bottom of the wing that lifts it into the air.
Paper airplanes create lift a little differently. Because their wings aren’t shaped like those on real planes, these paper vehicles rely on gravity to achieve lift. After you throw a paper plane, the gravitational force that pulls it down makes the air pressure below the paper “wings” higher than the air pressure above them, causing the paper airplane to fly.
Weight is the downward force caused by gravity. While gravity helps create lift at the start of a paper plane’s journey, over time, the paper’s weight causes the plane to fall back to the ground and land.
Drag is a force that acts opposite to a plane’s thrust and slows it down. This occurs because of friction from the air moving against the plane. Think about what happens when you ride downhill on a bike or sled—it feels like the air is pushing against you. That force pushing on you is drag. All planes experience drag from the wind pushing against the thrusting force—whether that force comes from an engine, a propeller, or someone’s arm.
Each of these forces plays a vital role in helping planes—including paper ones—reach their destinations.
Make a Paper Airplane at Home
A simple paper airplane leads to loads of fun, and all you need is a sheet of paper!
Children can perform each step of this craft with supervision, but an adult may need to help younger children when necessary. And if you want to ensure your kids’ planes take off successfully, we recommend having an adult double-check the folds before the first launch.
Here’s our step-by-step guide on how to fold a paper airplane:
Materials
- 1 sheet of paper
Directions
1. Fold the paper in half along its longest axis, crease it, then unfold it. This creates a line to guide you during the next steps.
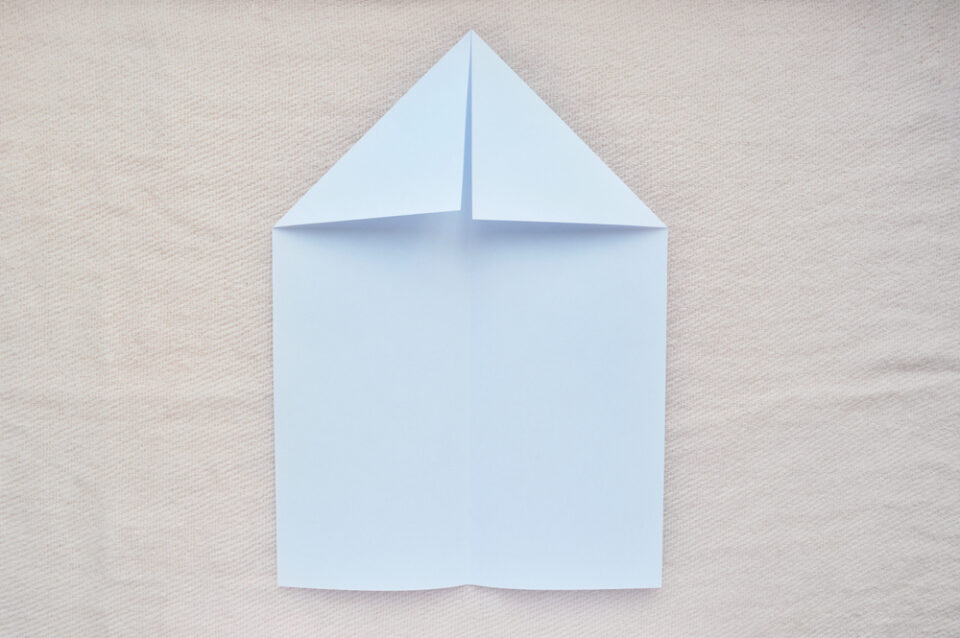
2. Fold the top corners toward the center crease, aligning the edges together. This will create 2 identical triangles at the top (see the image above).
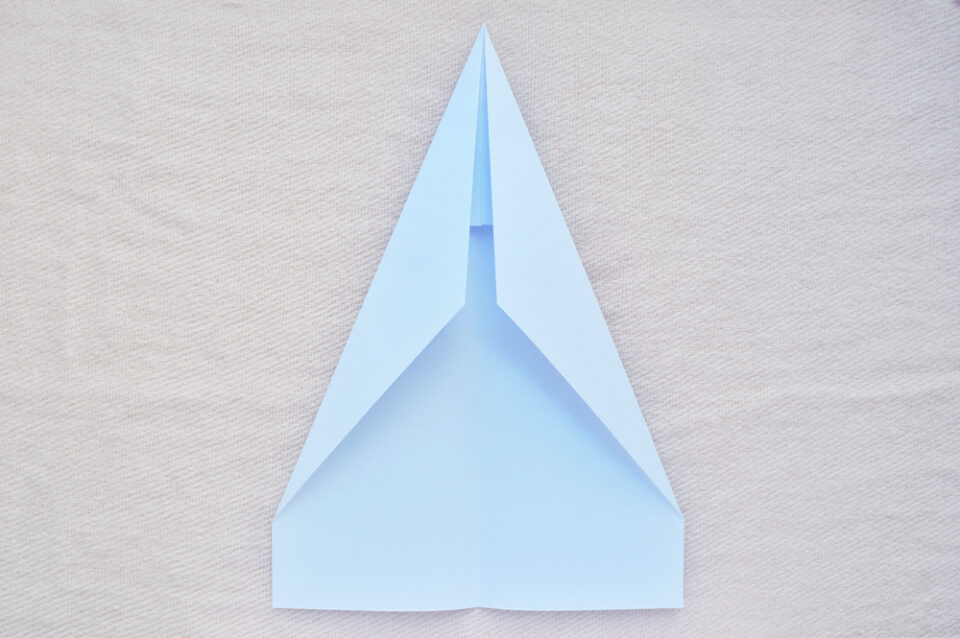
3. Fold the bottom-left corner of the left-hand triangle diagonally toward the center line and crease. Repeat with the bottom-right corner of the right-hand triangle (see the image above).
4. Fold the plane in half along that center line once again, this time in the opposite direction. The folds you made in steps 1–3 should be visible on the outside of the plane.

5. Finally, fold the wings down to meet the bottom edge of the plane’s body, then straighten them so they’re parallel to the ground (see image above). Your DIY paper airplane is ready to take flight!
Kids can customize their planes with colored paper or designs drawn on the sides. We recommend avoiding stickers or sparkles—the extra weight could throw off the plane’s flight.
Paper Airplane Tips and Tricks
Making a paper plane only takes a few simple steps, but getting a paper plane to fly across the room? That can be a greater challenge. Don’t worry—your kids’ planes will be whizzing around in no time with these tips:
- Be precise. The folds on your paper airplane need to be neat and exact. Extra folds or creases in the paper will create additional drag and keep your plane from getting the lift it needs to stay in the air. Keep your folds as flat as possible!
- Use quality paper. Another way to reduce drag is to use “ultra-smooth” paper. You can also reduce the plane’s weight by using printer paper over other alternatives, such as craft paper or cardstock.
- Tilt your wings upward. Your paper plane may not have wings that are shaped like a real plane’s, but you can still adapt the wings to achieve extra lift. Instead of folding the wings so they lay flat and parallel to the floor, try tilting them upward. This creates more lift above the plane’s center of gravity, which keeps it in the air longer.
- Practice, practice, practice! Try making several planes until you find the design that works just right. The more you experiment, the better your folding will be.

Launch Your Children’s Imaginations
Paper planes are a great way to introduce your kids to aerodynamics and engineering from the comfort of the living room. And understanding how airplanes work just might inspire them to take a few flights of their own.
Once you master how to make a paper airplane for kids, why not try other fun activities involving paper? These cute pinwheels are a perfect craft to explore how wind energy affects machines like windmills, and an origami heart will put those folding skills to the test!