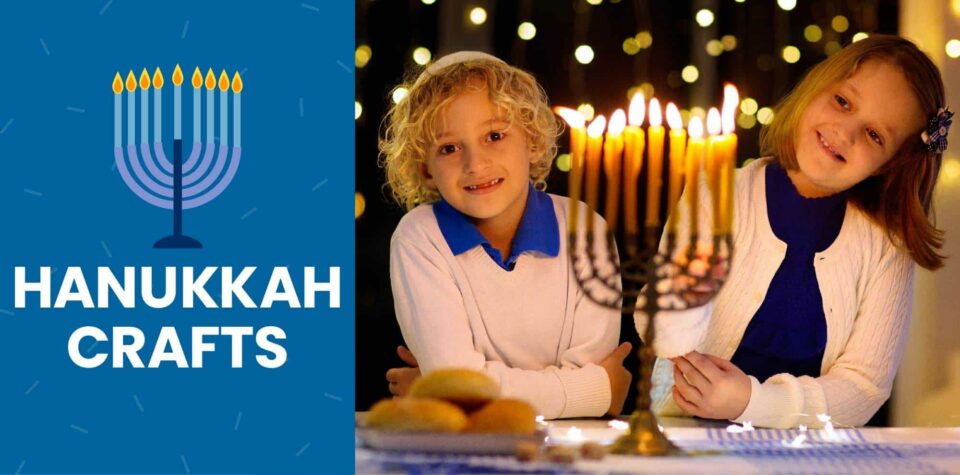
3 Hanukkah Crafts to Celebrate the Festival of Lights
Happy Hanukkah—or Chanukah, depending on how you spell it! The winter celebration, also known as the Festival of Lights or chag ha-oorem in Hebrew, is an important Jewish holiday centered around family, tradition, and light.
Hanukkah’s origins date back to the second century BCE, when Antiochus IV Epiphanes, then-king of Syria, held control of Judea, or what is now Israel. Antiochus tried to suppress Judaism in the region, so a Jewish family known as the Maccabees led a rebellion against the king.
The Maccabean revolt successfully drove the Syrians out of Jerusalem, and Judah Maccabee asked the Jewish people to cleanse and rededicate their Holy Temple. At that point a miracle occurred: The Jewish people only had enough oil to light the temple’s menorah for one day, but according to the Talmud (one of Judaism’s most central texts), the oil burned for eight nights.
Today, Jewish people remember this miracle by lighting a menorah, eating foods fried in oil, and celebrating with their loved ones for eight nights.
DIY Hanukkah Crafts
To get into the Hanukkah spirit, try making fun, festive, and memorable DIY projects as a family. Here are a few of our favorite Hanukkah crafts for kids.
Let’s Make a Menorah
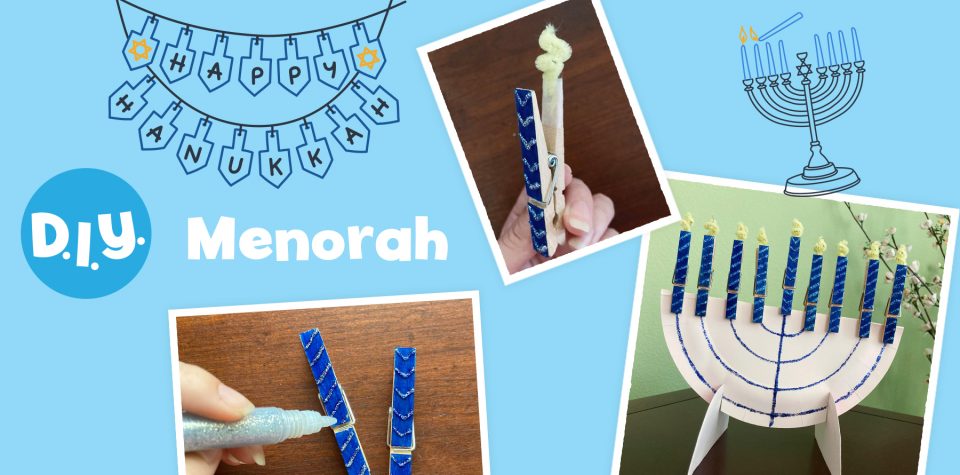
The menorah plays a prominent role in the Hanukkah tradition, and its candles represent the miracle of the oil in the Talmud. A Hanukkah menorah has nine branches: one candle for each of the eight nights of Hanukkah and one shamash, the “helper” candle. The shamash candle is used to light the other eight candles and sits in the middle of the menorah.
During each night of Hanukkah, families gather to light the candles in celebration. They begin by adding one candle on the far right of the menorah, and with every night, another candle is added and lit. On the eighth and final night of Hanukkah, the menorah is full.
Help your children create their own special menorah with this menorah craft and “light” a pretend candle each night of Hanukkah.
Materials
- 3 sturdy paper plates (1 large, 2 small)
- 9 wooden clothespins
- Child-safe scissors
- 2 yellow, orange, or red chenille stems
- Clear tape
- Washable blue markers or paint
- Blue and silver glitter glue
Note: The traditional Hanukkah colors are blue and white, symbolizing the flag of Israel. Blue and white are theologically important colors in Judaism: the tallit, or Jewish prayer shawl, is customarily made in a white fabric with black stripes and one blue string. Silver and gold are also often added to decorations, and many menorahs and Hanukkah candles follow this color scheme.
Directions
- Using markers or paint, kids color each clothespin blue and set the clothespins aside.
- Kids fold the large paper plate in half and crease at the fold. Using blue glitter glue, markers, or colored pencils, they draw a line down the middle of the folded plate, beginning at the flat bottom edge.
- On both sides of the vertical line, kids mark 4 dots at equal distances from each other. An adult can help.
- Kids connect the dots on either side with half-circle swooshes (in the shape of the letter U) and set aside. Tip: It’s easier to get a good result if they use a pencil to sketch lines before using paint or markers.
- When the clothespins are dry, kids decorate them with silver or gold glitter glue, markers, or paint. They should make one of the clothespins different from the others—this will be the shamash.
- An adult cuts the chenille stems into 9 even “flame” pieces. Each piece should be around 1 ½–2 inches (3–5 centimeters) long.
- For each flame, an adult bends one quarter of the chenille downward at a 90-degree angle. Twist the longer end into a spiral shape.
- Kids tape a flame to the back of each clothespin. The pretend candles are ready!
- When the folded paper plate is dry, an adult helps cut slits on either side of the flat bottom edge. The slits should be 1 ½–2 inches (3–5 centimeters) deep at ⅓ and ⅔ along the fold.
- Kids fold a small plate in half and crease, then cut it in half using the crease as a guide. (An adult will need to help younger children.)
- An adult trims off the raised edges of the cut plate halves, then cuts a 1-inch (2 ½-centimeter) slit at the top of the curved side of each half. These pieces will act as stands for the paper plate menorah.
- An adult inserts the stands into the menorah so the slits interlock. To make the base sturdier, double up with a second small plate cut in the same way as the first.
- The menorah is ready! Kids can add their candles from right to left.
On the first night of Hanukkah, add a candle to the far right of the menorah. With each day, add another candle to its left. Remember the shamash always sits in the center of the menorah, a little higher or lower than the others.
Watercolor Dreidel
A dreidel is a spinning top that Jewish people use to play a game during Hanukkah. The dreidel has four sides, each inscribed with a letter from the Hebrew alphabet: nun, gimmel, hey, and shin. These letters represent the Hebrew phrase nes gadol haya sham, or “a great miracle happened there,” with “there” referring to Israel. In Israel, shin is replaced by the letter pey, changing the meaning to “a great miracle happened here.”
The letter facing upward after a spin dictates how many game pieces (often chocolate coins called gelt) a player receives from the game piece “pot.” Nun earns you no pieces, gimmel earns you everything in the pot, hey earns you half, and shin means you must put one piece back into the pot. Don’t worry about memorizing the rules—we have a free printable that can help you remember.
This dreidel craft allows your kids to create their own art pieces inspired by the top’s unique shape. String them together to make a stunning dreidel garland, use them as name tags for your Hanukkah gifts, or scatter the dreidels on your table for fun Hanukkah decorations.
Materials
- Cardboard
- Watercolor paints and brushes
- Child-safe scissors
- Clean jar (to hold water)
Directions
- Cut the cardboard into the shape of a dreidel (a pentagon-shaped top). An adult can do this during craft preparation, or older kids can cut their own.
- Pour water into the jar. Kids dip the brushes into the water, then use the wet brush to dampen the watercolor paints.
- Kids paint their dreidel with festive patterns or designs.

Craft Stick Star of David
The Star of David is a symbol formed by creating a six-pointed star using two overlapping triangles. The symbol has become synonymous with Judaism, and appears on the flag of Israel. This simple Star of David craft is a fun way to get your children excited about Hanukkah (or any upcoming Jewish holiday).
Materials
- 6 craft sticks
- Nontoxic glue
- Washable blue markers (or paint)
Directions
- Kids form a triangle with 3 craft sticks, then apply glue at the points of the triangle to adhere the sticks together.
- They repeat with three more craft sticks.
- Kids place the two triangles together, one on top of the other, to make a six-pointed star (see image above). They then add glue to each intersection point to hold the star in place.
- Kids use a blue marker or paint to color the Star of David.
It’s Time to Celebrate
Hanukkah is a special time for Jewish people to come together with family and friends, remember history, and celebrate culture. You might eat tasty foods (we have a few recipes to try), sing Maoz Tzur as loudly as you can, or craft with your kids! No matter how you celebrate Hanukkah, cherish this time with your loved ones.
If you’re not Jewish, your family can use these crafts as a jumping-off point to learn about the holiday and Jewish culture. Introducing your children to global celebrations is a wonderful way to encourage their interest in other people and places.
If your children love learning about faraway countries and new traditions, check out our World Edition subscription box. Your kids will receive activities, recipes, stories, and more highlighting a different country every month, so their imaginations can explore the world from home.