DIY Map Craft for Kids
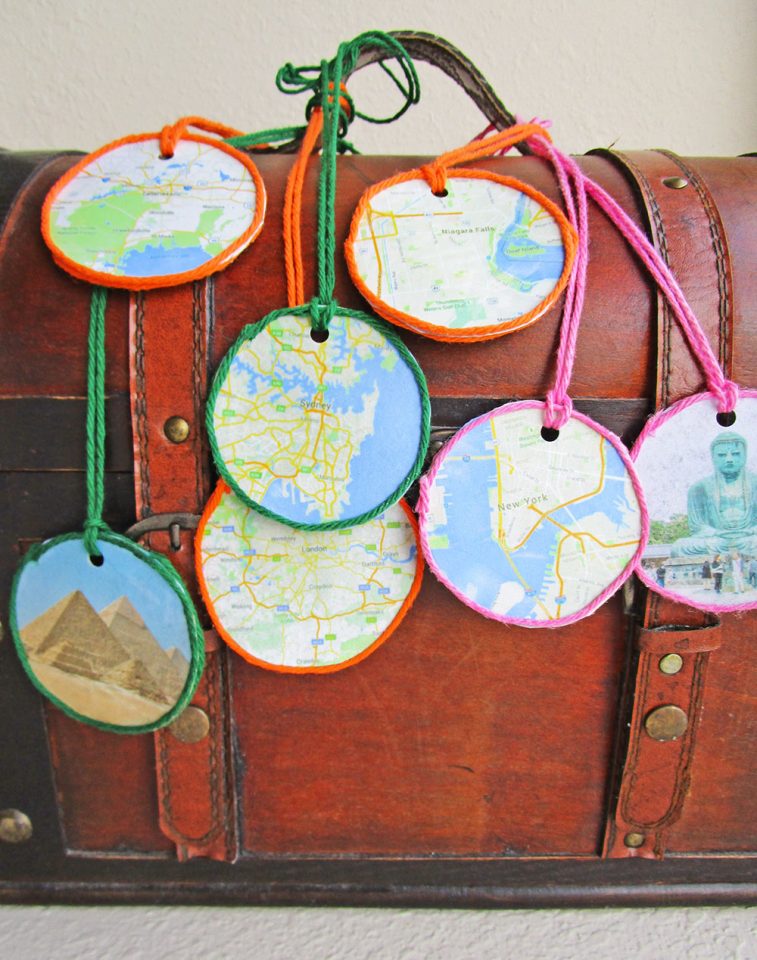
Remember past trips or dream of new ones by crafting your very own map pendants. You can even attach them to your suitcase so your luggage stands out. Since these pendants are two-sided, they can also include photos of landmarks or natural wonders that correspond with the maps. Happy crafting!
Expert tip: This craft is easy for kids of all ages, but because the glue does require a bit of drying time, you may want to split the steps over a period of two days.
Supplies:
- Empty boxes (we used cracker boxes)
- A glass or other round object
- Scissors
- A pencil
- White glue
- A hole punch
- Yarn
- Maps (we printed ours from Google Maps and National Geographic Maps)
- Photos of landmarks (find images online)
- A computer, printer and printer paper (or old travel magazines and atlases)
Step 1: Flatten a cracker box and trace circles onto the cardboard. Then, cut the circles out. 
Step 2: Have a discussion with your kids about where your family has been or where you would like to go. Then, search online for maps and images of landmarks. We chose the Pyramids of Giza (Giza, Egypt), the Sydney Opera House (Sydney, Australia), The London Eye (London, England), Niagara Falls (Niagara Falls, Ontario, Canada), The Empire State Building (New York City, New York, USA) and Daibutsu – the Great Buddha (Kamakura, Japan). 
Step 3: Resize and print the images. Then, place and trace the circles and cut them out. 
Step 4: Using a scrap piece of cardboard (or old paintbrush), cover one side of a cardboard circle with glue and lay a map cutout on top. Optional: Cover the map with another layer of glue as a protective coating. Once dry, repeat the process on the opposite side with the landmark photo. 
Step 5: Glue a piece of yarn around the outside of the map and allow it to dry. Then, glue yarn around the outside of the landmark. Don’t worry if the yarn is too long as it can be trimmed later. 
Step 6: Punch a hole at the top of the circle. 
Step 7: Cut a length of yarn, fold it and push it through the hole. Run the end pieces through the loop and tie into a necklace. 
Step 8: Wear your Map and Landmark Pendants separately or together as a reminder of where you’ve been and where you would like to go.  You can enjoy your pendants or give them out as gifts!