
It’s Spooky Season! Six Easy Pumpkin Carving Ideas for Kids
One of the most enduring symbols of the spooky season is the jack-o’-lantern, that glowing, grinning pumpkin that guides trick-or-treaters to the door every Halloween. But let’s backtrack a little: How did a gourd come to be the mascot of the holiday?
Gather the whole family around the fire because the legend of the jack-o’-lantern is the perfect way to kick off the season and inspire your Halloween pumpkin carving ideas for kids.
The Tale of Jack-o’-Lantern
Once upon a time, there lived a man named Jack who loved playing tricks in his little Irish village. Legend has it that when he died, he continued to haunt the roads of Ireland at night.
Jack’s spirit had a problem: He needed light to see, but all he had to light his way was a burning lump of coal. The coal was too hot to hold, so he sliced the top off a turnip, hollowed it out, and dropped the burning coal inside to make a lantern.
People found the lantern spooky, and Jack loved scaring people with it, especially on Halloween. So he soon became known as Jack o’ the Lantern (Jack of the Lantern).
When people wised up to Jack’s tricks, they began carving turnips with ghoulish faces to scare him away. Irish immigrants brought the tradition to America, swapping turnips for easy-to-carve pumpkins. And that’s the story of the jack-o’-lantern tradition we know and love in the U.S. today.
Ready to carve a jack-o’-lantern of your own? We’ve got tips for finding and prepping the perfect gourd, plus some great pumpkin carving ideas for kids to keep old Jack from playing tricks on you this Halloween.
The Ideal Setup for Pumpkin Success
The key to carving a stellar jack-o’-lantern is choosing the perfect pumpkin for the job. Select a gourd that’s:
- Fresh and firm: Check for mold or soft spots, and look for a green stem (this means the pumpkin is freshly picked and healthy). Press down on the brown knob on the pumpkin’s underside to make sure it’s firm.
- The right shape: Look for a flat, stable bottom so your jack-o’-lantern doesn’t fall over when it’s lit.
- Smooth and bright: Bright colors will stand out at night, and a smooth pumpkin will make carving easier.
Pumpkin Carving 101
Now that you’ve found the perfect pumpkin, it’s time to prepare the gourd for carving. Let the adults handle the knives and carving instruments. Your young decorators can help by drawing on the pumpkin and scooping out the pulp.
1. Gather your tools:
- Pumpkins
- Something to protect your workspace from spills (newspapers, plastic bags, or butcher paper)
- A kid-friendly pumpkin carving kit, a serrated knife, a sturdy spoon or ladle, and a utility knife
- A bowl for discarded pumpkin pulp and seeds (if you plan to roast the seeds, grab another bowl to store them in)
- A permanent marker
- Paper towels or kitchen towel
- A battery-operated tea light or candle
2. Wipe it down: Clean the pumpkin’s skin face, drying it thoroughly to prevent your knife blade from slipping.
3. Add the features: Have the kids draw a face or other pattern on the pumpkin with a marker, or do it for them if they find it too hard. You can draw the features freehand or use a stencil or printable template.
4. Mark the lid: Show the kids how to draw a circle about 6 inches (15 centimeters) wide around the stem.
5. Cut out the lid: Using a serrated knife or carving tool, the adult should cut along the lid outline, tilting the blade at a 45-degree angle to prevent the cover from falling inside the pumpkin later.
6. Hollow out the pumpkin: Have the kids use a sturdy spoon or pumpkin scoop to remove the insides. (If you don’t mind the mess, they may love getting their hands in there too!) Scrape the inner edges of the gourd to remove the stringy bits.
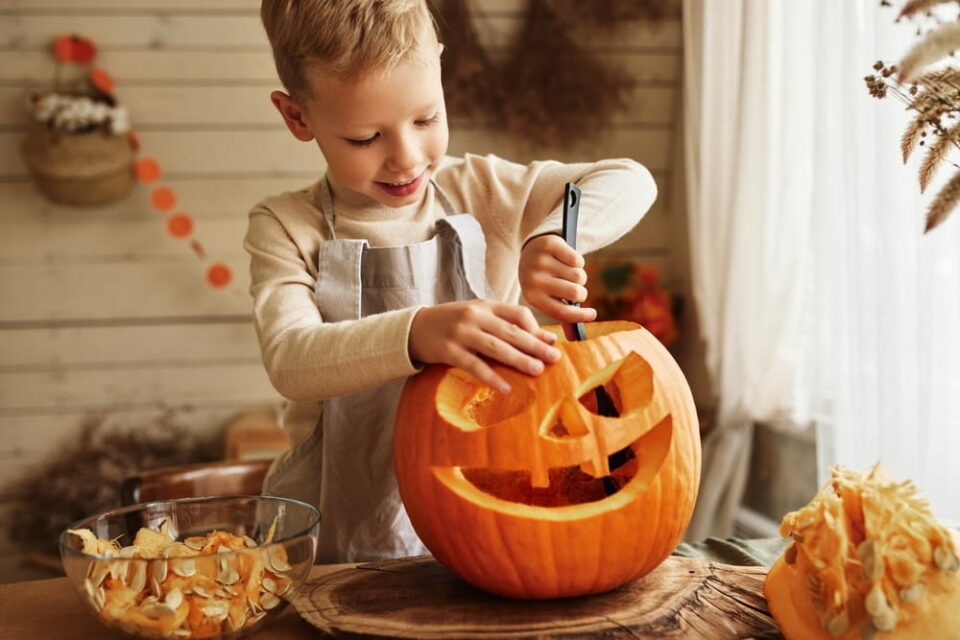
7. Cut out your design: (Adults only.) Using the serrated knife or carving tool, you cut along the lines you’ve traced onto the pumpkin. Kids can use their fingers to help remove the cut-out pieces of pumpkin once the carving is done. Don’t worry if the cuts are a little ragged. You can always smooth them out later with a utility knife.
8. Light it up: Have the kids place a battery-operated candle or tea light inside the pumpkin.
9. Display: Let the kids pick a spot for the pumpkin on a solid surface on your front porch with your other Halloween decorations. Turn on your light and prepare for trick-or-treating!

Jack-o’-Lantern Ideas
Now that you’ve gotten the hang of carving your first pumpkin, it’s time to get creative. Let’s look at some kid-friendly pumpkin carving patterns to try with your favorite spooksters.
Cookie Cutter Pumpkin
If you’re looking for a Halloween craft simple enough for the youngest trick-or-treaters, look no further than this simple pumpkin carving idea for kids. With a set of cookie cutters and a rubber mallet, you can create a fun, easy design. Under your kids’ supervision, place the cookie cutter where they ask you to. Then tap gently with the mallet until the cookie cutter fully penetrates the pumpkin’s wall. Remove the cut-out pieces of pumpkin, and you’re ready to light your jack-o’-lantern!
Animal Pumpkin
Animal shapes are a popular way to decorate pumpkins. Make a cat or a dog pumpkin by carving out a small face, painting on whiskers, and attaching cardboard ears. Or to make an owl, carve two big eyes, a beak, and feathers, topping it off with a pair of cardstock wings.
Chatty Pumpkin
Have something to say this Halloween? Cut words into your pumpkin to send a holiday message like “3, 2, 1, Boo!” or “Happy Halloween.”
Become a Master Carver
Once you’ve carved a few pumpkins, you’ll be ready for some advanced tips. Here are a few things you can do to make the process go even faster:
- Thin the walls: Make carving easier by shaving the pumpkin’s interior walls down to a thickness of between ¾ of an inch and 1 inch (1.9–2.54 centimeters).
- Make a plan: If you want to create an ornate pumpkin, draw it out ahead of time on tracing paper. To transfer the design onto the pumpkin, an adult places the tracing paper over the pumpkin, then uses a skewer to prick holes along the lines of the design.
- Plan out your time: Carving a pumpkin can take 4 hours or more, depending on the design. Be patient and go slowly. And keep your kids’ pumpkin design simple if you’re short on time.
- It doesn’t have to be perfect: The most memorable jack-o’-lanterns are full of character, so make good use of unique features on the pumpkin and lopsided pumpkin shapes.
Are you looking for more family fun this season? Make a festive pumpkin T-shirt or explore some spooky superstitions to ease you into the Halloween spirit. Or add a fun dimension to your decorations by creating your own witch’s brew of foaming and fizzing potions.
If your kids loved the legend of Jack o’ the Lantern, why not keep the discovery going with our World Edition subscription box? They’ll explore new countries and cultures through games, stories, and hands-on activities that foster connections to the world.