Turn a Favorite Activity into Art with Bubble Painting
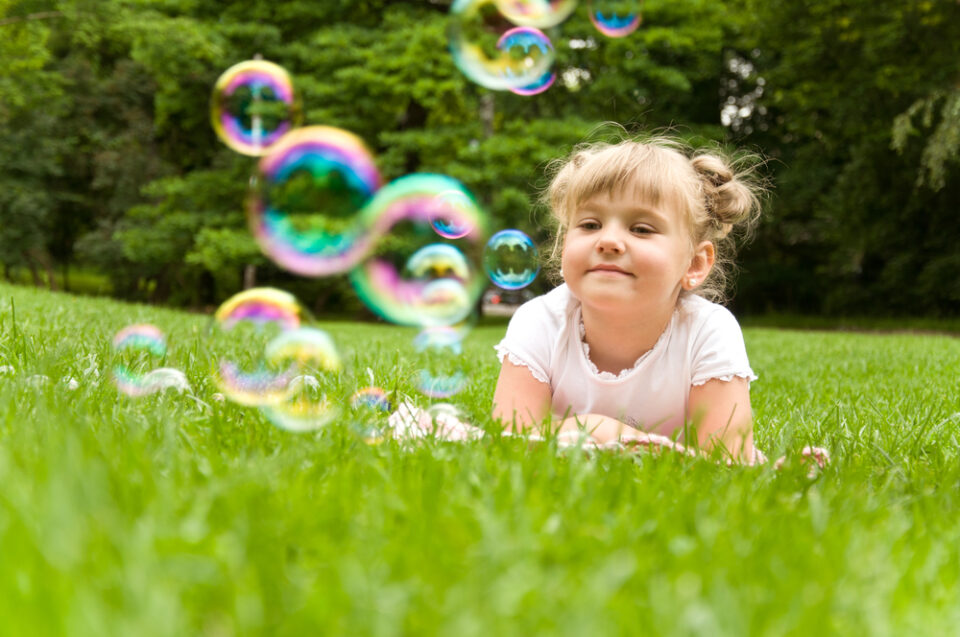
Bubbles are a blast. Whether kids run around trying to catch them or take turns trying to blow the biggest one, it’s hard to resist these shiny, floating wonders. In fact, bubbles have been popular among kids since the eighteenth century. Aside from providing loads of fun during outdoor playtime, bubbles can also be used to create some pretty cool art. Check out our guide to making beautiful bubble paintings!
How Do Bubbles Form?
The soap bubbles kids are used to playing with are created when air passes through a thin sheet of soapy water, becoming trapped inside. The sheet takes on a spherical shape as it fills, resulting in whimsical little pockets of air that float around.
What makes soap so good for blowing bubbles? The answer has to do with a scientific concept called surface tension.
Surface tension refers to the strong bonds between a liquid’s molecules. Water has one of the highest surface tensions because its molecules are so strongly attracted to one another. This is why bugs like water striders can skitter around on the surface of a pond—the attraction between water molecules causes the top of the pond to behave like a very delicate skin.
When you add soap to a container of water, the soap molecules increase the distance between the water molecules. This lowers the solution’s surface tension enough that when you add an external force (like the wind or your breath), the soapy water can change and hold a new shape., The next thing you know, you’ve got bubbles!
Painting without a Paintbrush
Bubble art is a fun opportunity to teach kids about the science behind blowing bubbles. Believe it or not, they can create unique paintings with just some bubble solution and a straw! Kids of all ages will have a wonderful time making their masterpieces. The bubble painting art technique is particularly great for young kids, as it combines two things many of them love: crafts and bubbles.
How to Bubble Paint with Your Kids
There are many ways to paint with bubbles, but we’ve picked two of our favorites here. No matter which method you try, this bubble activity is the perfect addition to your next painting party, summer barbecue, or any event that needs a little artistic flair.
Children can perform each step of these crafts with supervision, but an adult may need to help younger kids when necessary.
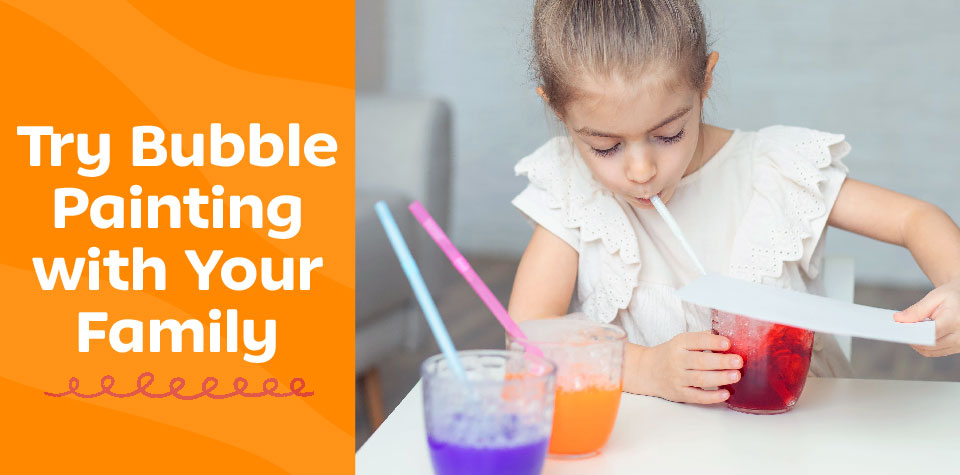
Bubble Glazing
Folks familiar with ceramics might know this bubble painting method as “bubble glazing.” This technique uses colored soap bubbles to create a marbled effect (like the picture above) on pottery. You may not have a kiln on hand, but your children can make their own bubble-glazed art on paper in the backyard or at the kitchen table (just be sure to put down a washable tablecloth or other protective covering).
Materials
- White cardstock
- Dish soap
- Washable, nontoxic tempera paint (in your children’s favorite colors)
- Small plastic cups (1 per color)
- Plastic straws (1 per color)
- Paper
Directions
- Pour ½ cup of water into a small cup. Mix in a generous squirt of dish soap and 1 teaspoon of paint. Repeat this step with different paint colors until you’ve created as many as you’d like.
- Place a straw into each of the cups. Blow into the straws to create bubbles in the mixture—and don’t be shy about overflowing. The bubbles should reach above the lip of the cup.
- Once the bubbles form, lay a sheet of paper over the top of a cup. This will create a colorful imprint of the bubbles on the page.
- Repeat with as many colors as you’d like to create overlapping patterns. Let the page dry completely before showing it off!
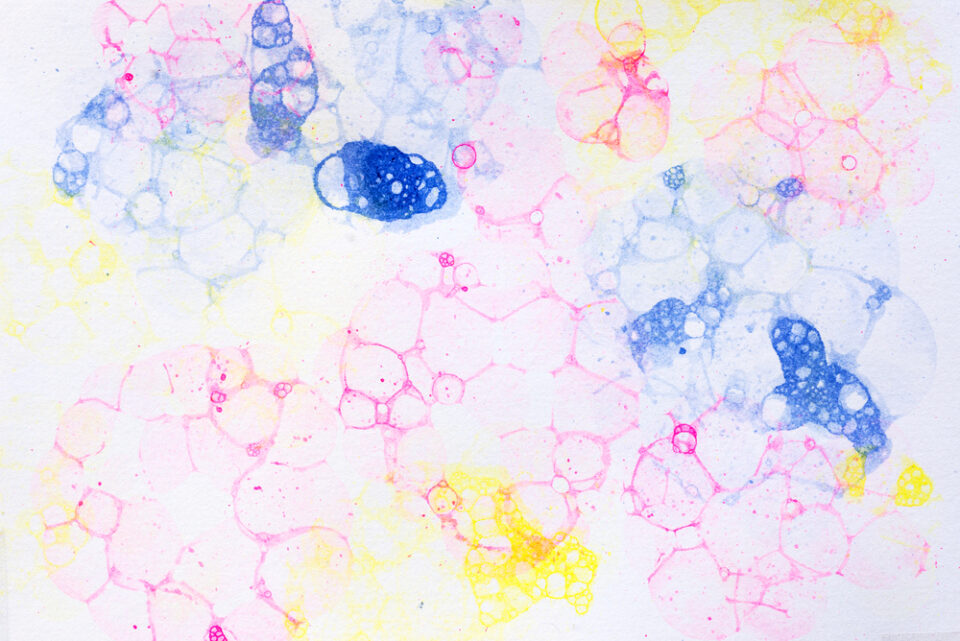
Float Painting
The “float painting” method requires bubbles to float down onto the paper. A breeze can be a challenge with this technique, but blowing into a cardboard box prevents the bubbles from floating away. It’s best to do this activity outside to make cleanup easier!
Materials
- Washable and nontoxic watercolor inks or solid paints (in your children’s favorite colors)
- Bubble solution and wands
- Cardboard box
- Small plastic cups
- White cardstock
- Tape
Directions
- An adult prepares a cardboard box with a closed bottom and open top by cutting a 4-inch-by-4-inch (10-centimeter-by-10-centimeter) “window” in the center of one side.
- Kids mix the watercolor inks or paints with bubble solution in the small cups (one cup per color). There should be enough solution in each cup to submerge the circular part of the bubble wand.
- An adult tapes a sheet of cardstock to the inside of the box on the side opposite the window. Flip the box on the work surface so the open top is facing down.
- Kids dip the wand into a colored bubble solution and blow bubbles through the window in the box toward the cardstock. The bubbles will settle on the paper and pop, creating a colorful design.
- Repeat with a variety of colors until happy with the picture. Once finished, set the cardstock aside to dry.

Learn through Art
Soap bubble painting is a great way to create artwork and teach your kids about science. But it’s not the only way to get them involved with art. Once you’ve wrapped up bubble art, embark on another project like DIY puffy paint, snow painting, or thumbprint dandelion art.
If your children enjoy learning through play, Little Passports offers them an awesome resource. We have several art and science-themed activity kits and subscription boxes designed to excite and educate.
Looking for your kids to learn more about bubbles? Expand their minds with our Ooey Gooey Science: Slime and Big Bubbles kit! This package contains a pair of experiments designed for kids ages 8 and up, providing them with the tools to make their own slime and larger-than-life bubbles. Young scientists can learn about chemistry and material science through tactile fun. For even more science fun, check out our Color and Craft: Tie Dye and Kaleidoscope kit. Children ages 8 and up can learn about color theory while tie-dying a tote and explore geometric angles by creating string art and a kaleidoscope.