
Make Delicious Whipped Cream at Home with This Simple Recipe
Think about a delicious ice cream sundae, pie, or crêpe. When you picture your perfect dessert, is it topped with a few dollops of whipped cream? If so, you’re not alone—whipped cream is popular with grown-ups and kids alike and makes for a tasty add-on to a number of treats.
This sweet topping has been around since the 1540s, when people made it by whipping cream with a willow branch. These days, it’s exciting to watch the cream burst out of the can—but did you know you can save a trip to the store and create your own in the kitchen with your kids? Here’s how to make homemade whipped cream.

Whipped Cream: An All-Time Favorite
Whipped cream is a light, sweet topping that pairs well with many breakfasts, desserts, and fruits. Not only does it taste delectable, but it’s also easy to learn how to make whipped cream with heavy cream, sugar, and vanilla—and it’s a fun and safe cooking project to take on with young chefs!
Here are some tips to help create a delicious finished product:
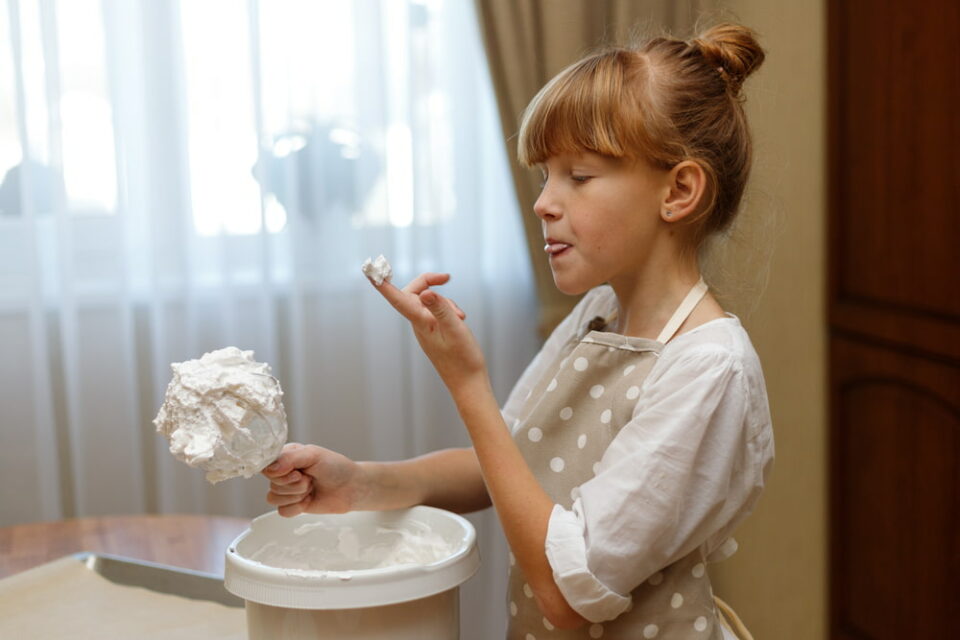
- As the name suggests, whipped cream needs to be “whipped” to become light and fluffy. Many cooks whip the cream with an electric beater until soft peaks are formed, then whisk by hand to finish. This will help you achieve stiff peaks without over-mixing, which can lead to a flat and soggy final product.
- When making whipped cream at home, keeping it cold is key. Chilled cream whips up faster and produces a lighter texture than room-temperature cream. Be sure to chill your heavy cream (and even your mixing bowl and beaters) for at least 15 minutes before you start whipping.
- Wondering just how long homemade whipped cream lasts? It typically stays fresh and light for about a day when refrigerated—so try not to make more than you need to avoid food waste. If you do have some extra whipped cream, don’t worry; you can stabilize it by mixing in a pinch of gelatin or cornstarch. This will help the cream last up to three or four days in a sealed container in the fridge.
Let’s Make Fluffy Whipped Cream Together!
Easy homemade whipped cream comes together in minutes and tastes spectacular. Below you’ll find two techniques: one using a mixer and another using a jar. Whichever you choose to follow, these simple kitchen activities will result in yummy whipped cream for you and your children to enjoy.
The Mixer Technique
When your children want something sweet and special, this recipe will deliver tasty whipped cream in a flash.
Ingredients
- 2 cups cold heavy whipping cream
- ½ cup confectioners’ sugar
- 1 teaspoon vanilla extract
Directions
- Put a large glass or metal bowl into the refrigerator to chill for 15–30 minutes.
- Next, remove the bowl from the fridge and place it on your work surface. Kids pour heavy cream, confectioners’ sugar, and vanilla into the bowl.
- An adult beats the ingredients using a hand or stand mixer with a whisk attachment. Start at a low speed and gradually increase to a high speed as the mixture firms.
- Beat for 60–90 seconds, then stop and let kids scrape down the sides of the bowl so all the ingredients are back at the bottom. Repeat until soft peaks form.
- Remove the bowl from the mixer. Help kids whisk the cream by hand until the peaks become stiff.
- Serve with your favorite sweet treat.
The Shaker Technique
If you don’t have a mixer handy, no problem. Try this technique for making whipped cream—you’ll wind up with the same end result, and your kids can get a little more hands-on fun.
Ingredients
- 1 cup cold heavy whipping cream
- 2 tablespoons granulated sugar
- 1 teaspoon vanilla extract
Directions
- Chill a mason jar in the freezer for 10–15 minutes.
- Kids add the cream, sugar, and vanilla extract to the jar and secure the lid. An adult should double-check to make sure it’s on tight.
- Kids shake the jar as fast as they can for 3–5 minutes (an adult may need to assist younger children). The whipped cream will form inside the jar, creating a personal-sized serving.
- Put a dollop on your kids’ favorite dessert and enjoy!
5 Foods That Can Be Topped with Whipped Cream
Whipped cream goes with just about anything sweet. Once you have your homemade topping, it’s time to put it on your kids’ favorite treats.
Short on ideas? Try it with any of these delicious desserts:
- Ice cream sundaes
- Waffles
- Milkshakes
- Hot chocolate
- Fruit salad
- Pie
- Crêpes
- Brownies
- Shortcake

Taste the World’s Flavors with Little Passports
Are your young chefs craving more time in the kitchen? Send their curiosity soaring around the globe with our Kitchen Adventures subscription box. Every month, they’ll receive kitchen tools and kid-friendly recipes created for young chefs ages seven and up.
Children will explore world cultures with fun, hands-on activities and build practical skills as they learn to cook with you. With more than 60 recipes from 12 countries and 100 flavors in store, your kids can experience many tastes of the world from the comfort of home.