Buon Natale! Enjoy Italian Christmas Cookies This Holiday Season
Move over, shortbread—there’s a new holiday cookie in town! Sweet Italian Christmas cookies will bring a delectable continental flair to your holiday baking. They’re delicious and simple to make, so adding them to your seasonal repertoire won’t cause any headaches. Plus, they’re so tasty your family just might start asking for them year-round.
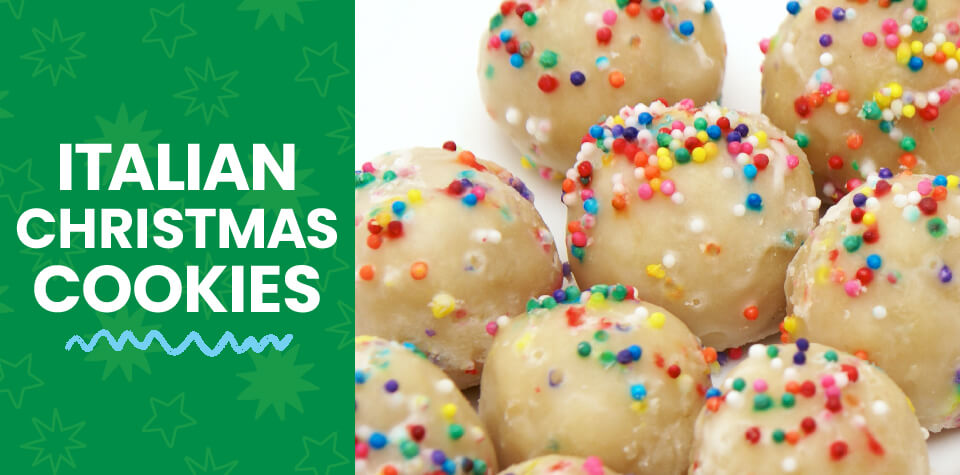
Old-fashioned Italian Christmas cookies are flavored with almond or anise, making them a refreshing change from the season’s usual offerings of chocolate, vanilla, and peppermint. They’re airier than sugar cookies and have a delightful cake-like texture—and they’re fun to look at, topped with a light glaze and colorful sprinkles for a festive flair.
Italy has a rich holiday baking tradition, and Italian Christmas desserts highlight some of the best of the country’s sweets. You’re probably familiar with Tuscany’s twice-baked biscotti, the perfect dipping cookie for tea and espresso. Baci di dama—or lady’s kisses—are hazelnut butter balls held together with a dollop of Nutella. Dainty pizzelles originated in the region of Abruzzo and require a unique waffle maker to create delicate, crispy wafer cookies. For those craving a butter cookie, flower-shaped canestrelli from Liguria will make your taste buds dance.
But among all those confections, these Christmas cookies shine as a flavorful and simple bake. Since this recipe for Italian Christmas cookies is a great opportunity to broaden young palates, why not invite the kids into the kitchen to whip up a batch?

Traditional Italian Christmas Cookie Recipe
Young chefs can handle many of the steps in this recipe with supervision, but operating the stand mixer and using the oven should be done by an adult. The total time to get the cookies made and decorated may seem long, but if you can set aside an afternoon or evening over the holidays to hang out in the kitchen, these cookies are the perfect tasty activity.
Prep time: 25 minutes
Total time: 2 hours 35 minutes
Cookies
INGREDIENTS:
- ⅔ cup granulated sugar
- ½ cup unsalted butter, softened
- 2 teaspoons vanilla extract
- ¾ teaspoon almond extract
- 3 large eggs
- 2 ½ cups all-purpose flour, plus more for dusting
- 2 teaspoons baking powder
- ¾ teaspoon salt
DIRECTIONS:
- An adult preheats the oven to 350ºF (about 175ºC).
- Using a stand mixer equipped with a paddle attachment on medium speed, an adult beats the sugar with the butter, vanilla, and almond extracts until light and fluffy, about 2 minutes.
- Add eggs 1 at a time and beat until combined. The kids can help with this step—just help them wash their hands after.
- Young bakers can whisk together flour, baking soda, and salt in a separate bowl. An adult sets the mixer to low speed and gradually incorporates these dry ingredients into the wet dough until a consistent texture forms.
- Remove the dough from the mixer and wrap it tightly in plastic wrap. Chill in the refrigerator for at least 1 hour and up to 4.
- Line two baking sheets with parchment paper. Using a cookie scoop or a tablespoon, adults and kids form the dough into 36 balls, with a 1-inch (approximately 2 ½ cm) height and diameter. If you find the dough a little too sticky to handle, dust your hands with extra flour. Place the cookies on the baking sheets.
- An adult places the cookies on the center rack of the oven to bake for 10–12 minutes, or until the cookies are firm and the bottoms are light gold in color. Once they’re done, place the cookies on a wire rack and let them cool for 30 minutes or until they reach room temperature.
- While the cookies are cooling, prepare the glaze and get ready to decorate.
Glaze
INGREDIENTS:
- 2 cups confectioners’ sugar
- 3 tablespoons milk
- ½ teaspoon vanilla extract
- Colored sugar or sprinkles
DIRECTIONS:
- Help children whisk together the confectioners’ sugar, milk, and vanilla extract in a bowl until smooth.
- Kids dip the top of each cookie in the glaze, then place it right side up on a wire rack set over parchment paper to catch any drips.
- Kids can then decorate the cookies with sugar or sprinkles.
- Allow the glaze to set for about 30 minutes before eating or storing cookies.
Variations
If you prefer anise flavor to almond, substitute ½ teaspoon of anise extract for ¾ teaspoon of almond extract.
When it comes to how to shape Italian Christmas cookies, you don’t have to stick with the ball shapes. Instead try rolling the batter into a 1-inch thick rope that you can twist, knot, or arrange into an S-shape.
And don’t shy away from playing with decorations. Instead of sprinkles, feel free to add mini chocolate chips, chopped nuts, or crushed candy canes on top of the glaze.
Storage
Baked cookies can be stored at room temperature in a sealed, airtight container for 2 to 3 weeks. If you want to make a large batch ahead of a cookie exchange, cookies can be frozen for up to 1 month. When you’re ready to serve them, take them out of the freezer to defrost and reach room temperature.

Cookies and Christmas Go Hand In Hand
Baking, especially at Christmas, is a wonderful opportunity to bring your family together and warm your house with the smell of the holidays. Even if you or your young ones don’t have a sweet tooth, cookies make for touching homemade gifts. So if you get the chance, gather in the kitchen and start making lasting holiday memories.
Are your children big fans of dessert, especially around the holidays? Introduce them to delicious cookie recipes from around the world, help them discover ways cultures incorporate cookies into their celebrations, or teach them about plum pudding, a British Christmas treat. Broaden your kids’ culinary horizons even further with our Kitchen Adventures subscription box. Every month, they’ll cook kid-friendly recipes and receive a new kitchen tool, build confidence and practical skills as they learn to cook with you, and explore world cultures with fun hands-on activities and games.