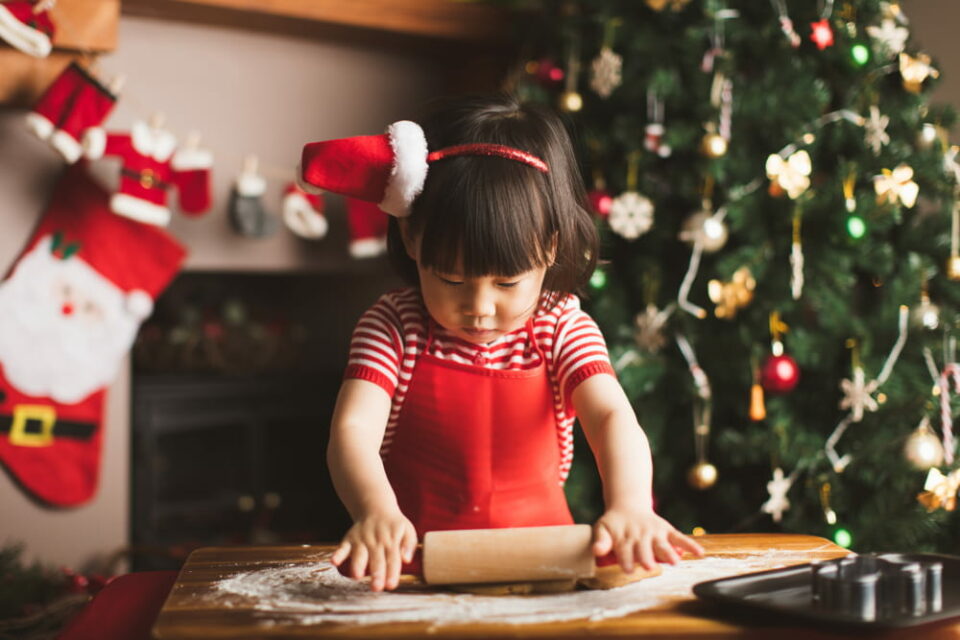
Ho! Ho! Ho! 3 Easy Christmas Crafts for Kindergartners
Whether you’re a kid, a grandparent, or somewhere in between, the holidays are about cherishing memories with family and friends while creating new ones. For younger kids like kindergarteners, it’s a time of joyous anticipation and excitement—so much they can hardly contain it!
Giving them opportunities to unleash their creativity is a great way to help them express their feelings. And there’s no better way than with festive and easy Christmas crafts for kindergartners like these. Plus, while these are perfect fun crafts for kindergartners, kids of all ages can have a go at them to immerse themselves in the holiday spirit.

Christmas Craft Ideas for Kindergartners
These craft ideas are easy and fun for kids, and they also make for memorable, one-of-a-kind gifts for loved ones or a little extra “thank you” to leave for Santa alongside milk and cookies. Best of all, they’ll allow your young ones to try something new while learning about gift-giving.
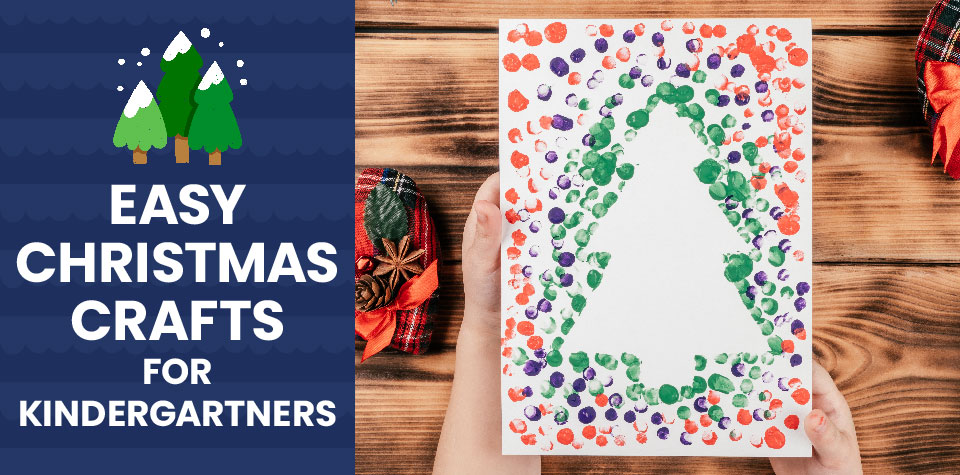
Fingerprint Christmas Trees
This is an easy Christmas craft with paper perfect for young artists and children who love playing with paint. Use these trees as part of your seasonal decorations alongside other favorite holiday crafts like this DIY button wreath, transform them into sweet greeting cards for your kids to send to loved ones, or leave them out for Santa. If you plan to give away the trees, we recommend having your young painters make extras as keepsakes—you’ll definitely want to save these little fingerprints!
Materials
- White paper
- Colored construction paper
- Paint (green, red, white, or any other holiday colors you prefer)
- Double-sided tape
Directions
- Adults start by drawing a Christmas tree shape on colored paper and cutting it out. Stick the newly cut-out tree in the middle of the white paper sheet using double-sided tape.
- Show your children how to dip their fingers in green paint and press them along the edges of the tree. Their fingerprints should mostly touch the white paper, although it’s okay if the paint touches the tree.
- Next, give your kids the freedom to put fingerprints all over the paper. Let them experiment with different patterns and colors (we recommend cleaning their hands before switching colors to avoid mixing paints). If they want to keep things traditional, the green can work as the base of the tree, while the other colors can function as lively ornaments.
- Once the kids have finished their masterpieces, peel the Christmas tree cutout off the white paper. You should still be able to see its silhouette in the negative space surrounded by the fingerprints.
Cinnamon Ornaments
DIY Christmas ornaments add character to your tree and make adorable gifts for grandparents, friends, and neighbors. Best of all, most homemade ornaments use materials you likely already have at home, from paper straws to pantry staples. This craft is similar to salt dough ornaments but uses cinnamon for an extra yuletide touch.
Materials
- ¾ cup of applesauce
- 1 cup ground cinnamon
- 2 tablespoons white glue
- Rolling pin
- Holiday-themed cookie cutters
- Drinking straw
- Ribbon
- Glitter, paint, rhinestones (optional)
Directions
- Start off by working together to mix the applesauce, cinnamon, and glue in a large bowl. While you can do this with a spoon, this dough works best when you dive right in and knead it with your hands. Adults, feel free to let your kids get messy while they explore and create!
- Once the applesauce, cinnamon, and glue form a soft dough that holds its shape when pressed into a ball, place it on the table or counter and roll it flat with a rolling pin. Your children can help with this step, but adults will want to finish rolling the dough to a consistent thickness (the ornaments will dry more evenly that way). Aim for dough that’s ½–⅓ inch (approximately 1–1 ¼ centimeters) thick.
- Let your children choose their favorite Christmas cookie cutters (we’re partial to a snowman!), and help them cut out a few shapes. Adults should then carefully move the shapes to a parchment-lined baking sheet. Next, kids can use the drinking straw to punch a hole at the top of each shape.
- Place the ornaments in the oven and bake them at 225°F (about 105°C) for 2–3 hours. This will dry out the dough and make them nice and solid. When the ornaments are finished baking, take them out of the oven and let them cool completely.
- From here, your kids have two options. If they want their DIY ornaments to be a neutral cinnamon color (which looks lovely against the traditional green Christmas tree), they can string a ribbon through the holes in the tops of each ornament and hang them up. If they want to add more flair, invite them to decorate the ornaments with paint, rhinestones, and glitter. Help them use the glue or paint, so things don’t get too messy. If kids decide to decorate the ornaments, let the ornaments dry before stringing and hanging them.
Reindeer Finger Puppets
While any time is good for imaginative play with puppets, this holds especially true during the holiday season. With these little reindeer puppets, your kids’ knack for storytelling will soar straight to the North Pole!
Materials
- Brown cardstock
- Googly eyes
- Black and red (for Rudolph!) pom-poms
- Child-safe scissors
- Glue
- Small clothespins
- ¾-inch hole punch
Directions
- Adults or older kids start by cutting two circles from the cardstock, with diameters of 4 inches and 2 ½ inches. Cut two additional small half-circles from the cardstock for the reindeer’s ears. (If you want, you can do this before bringing younger kids to the craft table.)
- Cut two diagonal strips off the sides of your 2 ½-inch circle. The finished shape will look like a trapezoid with a rounded top and bottom. This will be your reindeer’s head. Then use your hole punch and make two circles at the bottom of the 4-inch circle. This is where your children’s fingers will go through the finished puppet, acting as the reindeer’s legs.
- Help your kids glue the reindeer head to the larger circle. The finger holes should be at the bottom of the puppet, and the wider edge of the head should be at the top, tapering into the snout. Then glue the reindeer ears to the top of the head.
- Assist your children as they glue on the googly eyes and pom-pom nose. Finally, clip the two clothespins to the top of the head for antlers. Let everything dry, and enjoy watching your young ones play with their new little reindeer.

Let Your Kids Embrace the Magic of the Holidays
The holidays are always magical when you’re a kid, thanks in part to the adults who strive to make them as special as possible. Giving thoughtful gifts, taking them to parades and festivals, covering your home in beautiful garlands and twinkly lights inside and out—all these moments warm a kid’s heart and fill them with cheer. Best of all, the holiday season gives kids extra time with the people they love most (like you)!
This year, be sure to take a break from the hustle and bustle to enjoy special moments with your kids. Pull on your coziest sweaters, prepare some delicious hot chocolate, and allow the yuletide joy to guide you in deciding what’s on the agenda. Whether it’s building a gingerbread house, making some Christmas crackers, working on one of these kindergarten Christmas crafts, or snuggling up together to read a holiday story, you’re sure to see your children shine brighter than all the lights on the tree.