DIY Pinwheel Craft
Contributed by Brandy Nelson
 Explore the power of the wind with this colorful pinwheel craft!
Pinwheels resemble wind turbines, or machines that change the energy in wind into mechanical or electrical energy. A wind turbine, like a pinwheel, has a rotor with blades that is connected to a base. When wind hits the blades, the rotor and the base turn as well. As the base turns, it is able to produce either mechanical or electrical energy. The more wind that hits the blades, the more the rotor can turn, and the more energy the wind turbine produces!
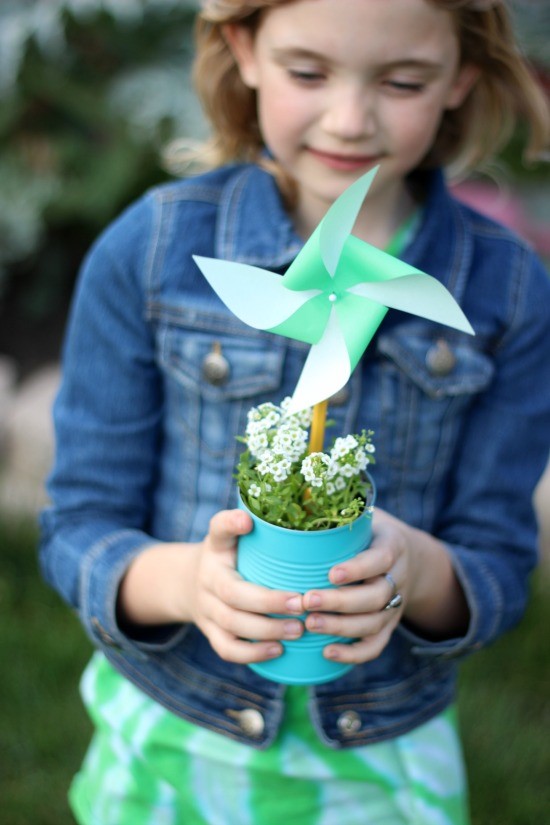
Wind power is a great topic to explore with kids during warm summer days, and can easily be demonstrated with this simple craft. These pinwheels come together fast and spin in the wind even faster! We used recycled tin cans, added 3 coats of spray paint and turned them into the perfect planters for our flowers and a way to display our pinwheels!
DIY Pinwheels
Origami paper (or use old magazines or scratch paper!)
Map pins
Double sided tape
Scissors
Pencil
 Expert tip: We like using origami paper because it is white on one side and colored on the other. It gives a nice pop when folded, but any paper will work for this project.
1. Begin by folding the square diagonally. Then open and fold diagonally once more, the other direction. Cut along the fold lines, stopping 1″ from the center.  2. Place a small piece of double sided tape in the center of the paper.
 3. You’ll notice you have 4 triangles. Bring the right corner of each triangle to the center. The double-sided tape will hold it secure. Overlap each corner in the center.
 4. Poke a map pin through the center.
 5. Place pencil behind pinwheel and push the pin into it. Do not poke all the way through.
 6. You can place your pinwheels in a garden or flower box outside to watch them spin, or create your own planter pot!
 7. Plant a seed and watch it grow, or use small flower starts from your local nursery.
 8. Place your pot outside and watch your pinwheel spin!
Want more activities to do with the kids? See below!
DIY Tissue Paper Globe
Edible Science Experiment for Kids!
 Brandy is a California girl married to an Alaskan boy. They’ve lived all over the country, moving where the Coast Guard sends them, and are parents to 4 children (and a black lab puppy). Brandy has been surrounded by creative influences her entire life. Her biggest mentors being her mother and grandmother. When she grew up and started to have a family of her own, her desire to create blossomed as she turned each new house into a home. Her blog, gluesticksblog.com, is a collection of some of her favorite kids activities, projects, recipes, and craft tutorials.